Screenshot API · Browser JavaScript · Updated
JavaScript Screenshot: html2canvas, Screen Capture API or a Screenshot API
"Take a screenshot in JavaScript" can mean three different jobs: turn part of your own page into an image, capture the user's screen with their permission, or capture any website by URL. Each needs a different tool. This page compares the three, with working snippets, then shows the screenshot API pattern with fetch in detail. For Node.js server code, see the Node.js screenshot guide.
300 free screenshots for the lifetime of the account. Also available via cURL.

Three ways to take a screenshot in JavaScript
| You want to | Use | Runs where | Main limit |
|---|---|---|---|
| Save a chart, card or the current page as an image | html2canvas (or html-to-image, modern-screenshot) | In the page | Re-draws the DOM; not a real screenshot, some CSS and cross-origin images fail |
| Let a user share what is on their screen | Screen Capture API (getDisplayMedia) | In the browser, with a permission prompt | The user must pick a screen or tab every time |
| Capture any URL, full page, from code | A screenshot API with fetch | On a server browser, called over HTTP | Needs an API key, which belongs on your backend |
Browsers do not let a script silently screenshot the user's screen or another website. That is why the first two options are limited to your own page or need the user's consent, and why capturing arbitrary URLs happens in a separate browser on a server.
Option 1: html2canvas for an element on your page
html2canvas reads the DOM and paints it onto a <canvas>. Good for "download this chart" buttons and feedback widgets:
import html2canvas from "html2canvas";

const canvas = await html2canvas(document.querySelector("#report"), {
  useCORS: true,   // load cross-origin images that send CORS headers
  scale: 2,        // sharper output on high-DPI screens
});

const link = document.createElement("a");
link.download = "report.png";
link.href = canvas.toDataURL("image/png");
link.click();
Because it re-creates the page instead of photographing it, results can differ from what you see: some modern CSS, iframes, video and images without CORS headers are not reproduced. Libraries such as html-to-image and modern-screenshot use a different technique (SVG foreignObject) and are worth trying when html2canvas misses styles. None of them can capture a page on another domain.
Option 2: the Screen Capture API for the user's screen
navigator.mediaDevices.getDisplayMedia() asks the user to choose a screen, window or tab, then gives you a video stream. Draw one frame onto a canvas to get a screenshot:
button.addEventListener("click", async () => {
  const stream = await navigator.mediaDevices.getDisplayMedia({ video: true });
  const video = document.createElement("video");
  video.srcObject = stream;
  await video.play();

  const canvas = document.createElement("canvas");
  canvas.width = video.videoWidth;
  canvas.height = video.videoHeight;
  canvas.getContext("2d").drawImage(video, 0, 0);

  stream.getTracks().forEach((track) => track.stop());
  const png = canvas.toDataURL("image/png");
});
It must be started by a user action (a click), works only on secure (HTTPS) pages, and shows the browser's sharing prompt every time. It captures pixels as they are on screen, so it is ideal for bug reports and support tools, not for automated captures.
Option 3: capture any URL with a screenshot API
Every capture is a request to https://api.snapshotflow.com/screenshot with a url query parameter and your API key in the X-Api-Key header. The response body is raw image bytes (PNG, JPEG, WebP) unless you ask for JSON with response_type=base64 or response_type=url.
X-Api-Key. The examples below use a placeholder key for clarity - same shape as our playground, which keeps the key in the browser only when the user pastes it themselves.
| Response shape | When to use it in the browser |
|---|---|
| Binary image (default) | fetch + res.blob() + URL.createObjectURL for an <img> preview. |
response_type=base64 | JSON with a data URL or base64 string - handy for canvas or LLM pipelines. |
response_type=url | Hosted download link you can pass straight to img.src without handling bytes. |
Capture with fetch()
Modern browsers - use fetch, check res.ok, then turn the body into a blob:
const params = new URLSearchParams({
  url: "https://example.com",
  full_page: "true",
  width: "1280",
});

const res = await fetch(`https://api.snapshotflow.com/screenshot?${params}`, {
  headers: { "X-Api-Key": YOUR_API_KEY },
});

if (!res.ok) {
  const err = await res.json().catch(() => ({}));
  throw new Error(err.message || res.statusText);
}

const blob = await res.blob();
const previewUrl = URL.createObjectURL(blob);
document.querySelector("#preview").src = previewUrl;
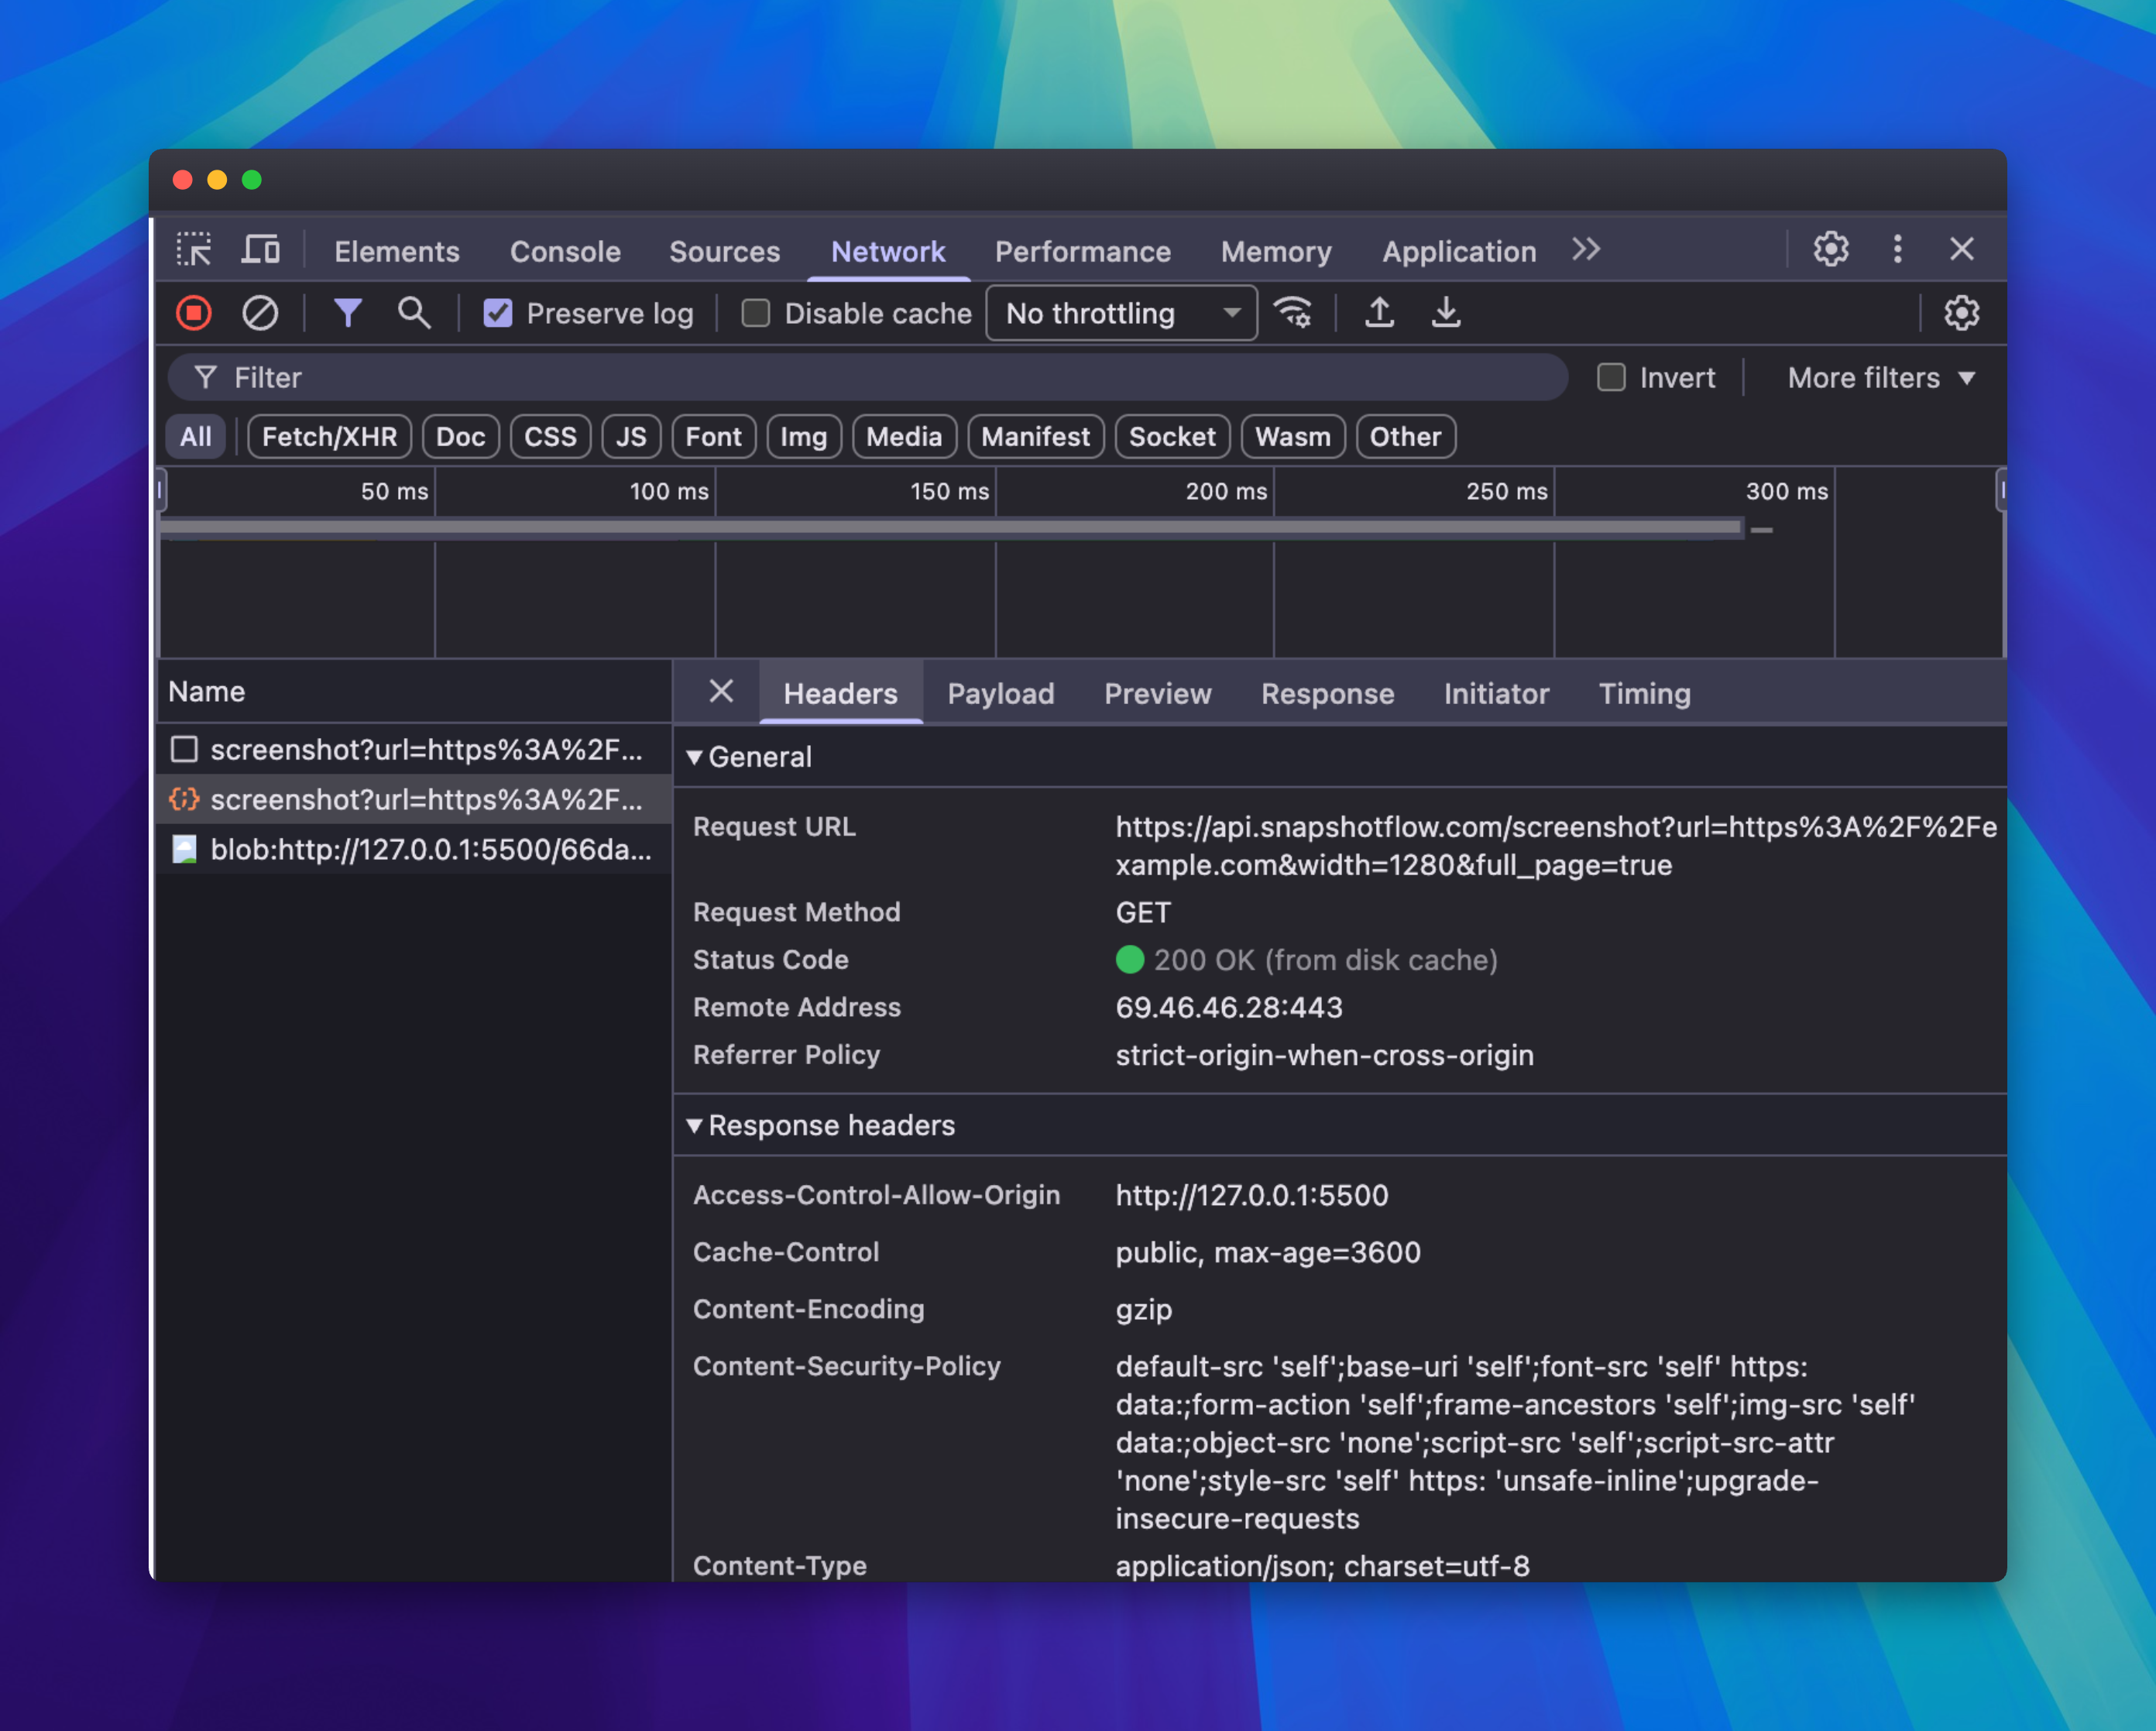
200 OK from /screenshot - check Content-Type to know whether the body is binary or JSON
Optional headers worth reading: X-Cache (hit/miss), ETag (for conditional requests), and X-Quota-* when you need remaining quota in UI.
Capture with XMLHttpRequest
Same endpoint, older API - useful in legacy codebases or environments without async/await. Set responseType to blob:
const xhr = new XMLHttpRequest();
const url = "https://api.snapshotflow.com/screenshot?url=" +
  encodeURIComponent("https://example.com") + "&full_page=true";

xhr.open("GET", url);
xhr.setRequestHeader("X-Api-Key", YOUR_API_KEY);
xhr.responseType = "blob";

xhr.onload = () => {
  if (xhr.status >= 400) return;
  const previewUrl = URL.createObjectURL(xhr.response);
  document.querySelector("#preview").src = previewUrl;
};

xhr.send();
Show the screenshot on the page
After you have a blob URL, wire it to an image element. Revoke the object URL when you replace the preview to avoid memory leaks:
const img = document.querySelector("#preview");
if (img.dataset.objectUrl) URL.revokeObjectURL(img.dataset.objectUrl);
img.src = previewUrl;
img.dataset.objectUrl = previewUrl;
Can I put the screenshot URL straight into an img src?
Technically yes: the API accepts the key as an api_key query parameter, so <img src="https://api.snapshotflow.com/screenshot?url=...&api_key=..."> renders an image. But the key is then visible in your page source and anyone can spend your quota with it. There are no signed URLs at the moment, so for public pages use a small route on your server that adds the key and caches the image, then point the img at that route. A ready-to-copy Node.js route is in our thum.io comparison, and a WordPress function in the mShots alternative guide.
Production pattern: backend proxy
In production, your frontend calls your API route. The server holds the SnapshotFlow key and forwards the request:
// Browser - no secret here
const res = await fetch("/api/screenshot?url=" + encodeURIComponent(pageUrl));
const blob = await res.blob();
Your server handler reads SNAPSHOTFLOW_API_KEY from env, calls api.snapshotflow.com, and streams the bytes back. That keeps quota under your control and the key out of bundled JS. Server-side Node code can use raw fetch or the snapshotflow npm package. If that route lives in a Next.js app, our Next.js App Router screenshot guide builds it as a Route Handler with URL validation and error handling.